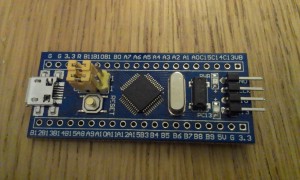
Several suppliers, mostly from China, offer boards based on the STM32 series of ARM CPU’s
From a friend of mine I got a small board containing the STM32F103C8T6. It has 20k of SRAM, 64k of Flash memory, 37 IO pins and runs at clockspeeds of up to 76 MHz. It is a full blown Cortex M3 core with lots of possibilities and the whole board is available under $10
That was the easy part, programming this thing is another…
You need a special programmer called the STLink-V2, originally from ST (of course) but lots of inexpensive copies can be found on Ebay. Ok, another weborder and some time later I had two of these programmers and tried attaching them to my laptop. Since I am running Linux I had to search for programming tools to use these devices. Also some udev rules are needed to have access to the USB programmer as a user.
A simple command line programming tool can be found at: https://github.com/texane/stlink
Now for some code…
Since I am a big fan of the mbed compiler and the mbed compiler supports one type of STM32, I tried making a simple ‘blinky’ type program and create a binary file to be uploaded to my board.
After selecting the STM32F108RB from the platforms page the compiler was setup.
The definition of the ‘myled’ IO pin needs to be changed to ‘PC_13’ and the code compiled without problems into a nice ‘myblinky.bin’ file.
With the following command line I programmed the binary into the board:
st-flash write myblinky.bin 0x8000000
The blue led on the board started blinking! Succes!
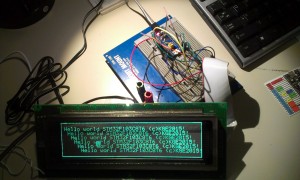
I already had made some code for testing a large Vacuum Fluorescent Display (VFD) connected to the mbed LPC1768 board so I tried to move the code over to the STM32 and plug the board into my breadboard setup with the VFD.
Results are below:
Speed of this CPU is very good and power consumption is very low.
At the moment I am still struggling with a proper debug setup:
The LPC1768 mbed board simulates a serial port over USB and it is very easy to send debug information to a running terminal. The STlink-V2 programmer supports a special debug channel which can be connected to Linux GDB but it offers no serial channel and it cannot read the mbed binary file for source code level debugging. On the web I found several howto’s to setup a complete system using Eclipse as IDE and the gnu arm compiler toolkit but after ending up several times in ‘dependency hell‘ I gave up on that.


You might have a look at http://developer.mbed.org/components/SWO-viewer/ to fix at least the serial channel problem.
I don’ t know if mbed has changed a lot since this was written or not but simply selecting “STM32F108RB” from the platforms does not appear to be possible.
With some experimentation I found the “NUCLEO-F103RB” is the closest. With the Blinky example program change “LED1” to “PC_13” and it should work.
I don’t know why people get all crazy with st-link. It’s a PITA to use, requiring special hardware. Instead connect your regular RS232-to-TTY adapter to the PA9/PA10 serial port (make sure to use 3.3V signaling), set the BOOT0 jumper, then simply program with “stm32flash” which is easily available out of most Linux distribution’s standard software libraries.
I still haven’t gotten anything to work from the command line manually compiling with gcc. mbed at least lets me know SOMETHING works. 🙂
can you host the bin file. I would like to flash it directly to my board.
Without similar hardware it would be of no use I’m afraid, do you have a similar display ?